Throughout the design and construction phases of a project not often enough or at all does the question arise, “where should the window be placed in the depth of the rough opening”?
Joseph Lstiburek has often noted windows are a “pain”, well that may be true, the project team still needs to determine if the windows will be “innies” or “outies”? If the window is not placed correctly (too far out or in) it could lead to;
- lower internal surface temperatures, which could cause condensation leading to the development of mold and/or
- an increase in heat loss, which means a higher energy consumption for the building
Looking at some heat transfer analysis in THERM can tell you to limit thermal bridging at the window to wall interface it is always best to place the window as close to the centre of the insulation layer as possible (Figure 1). To further boost performance and reduce heat loss the rough opening could be lined with insulation. If undertaking this method, ensure the insulation material has sufficient structural strength to support the load of the window.
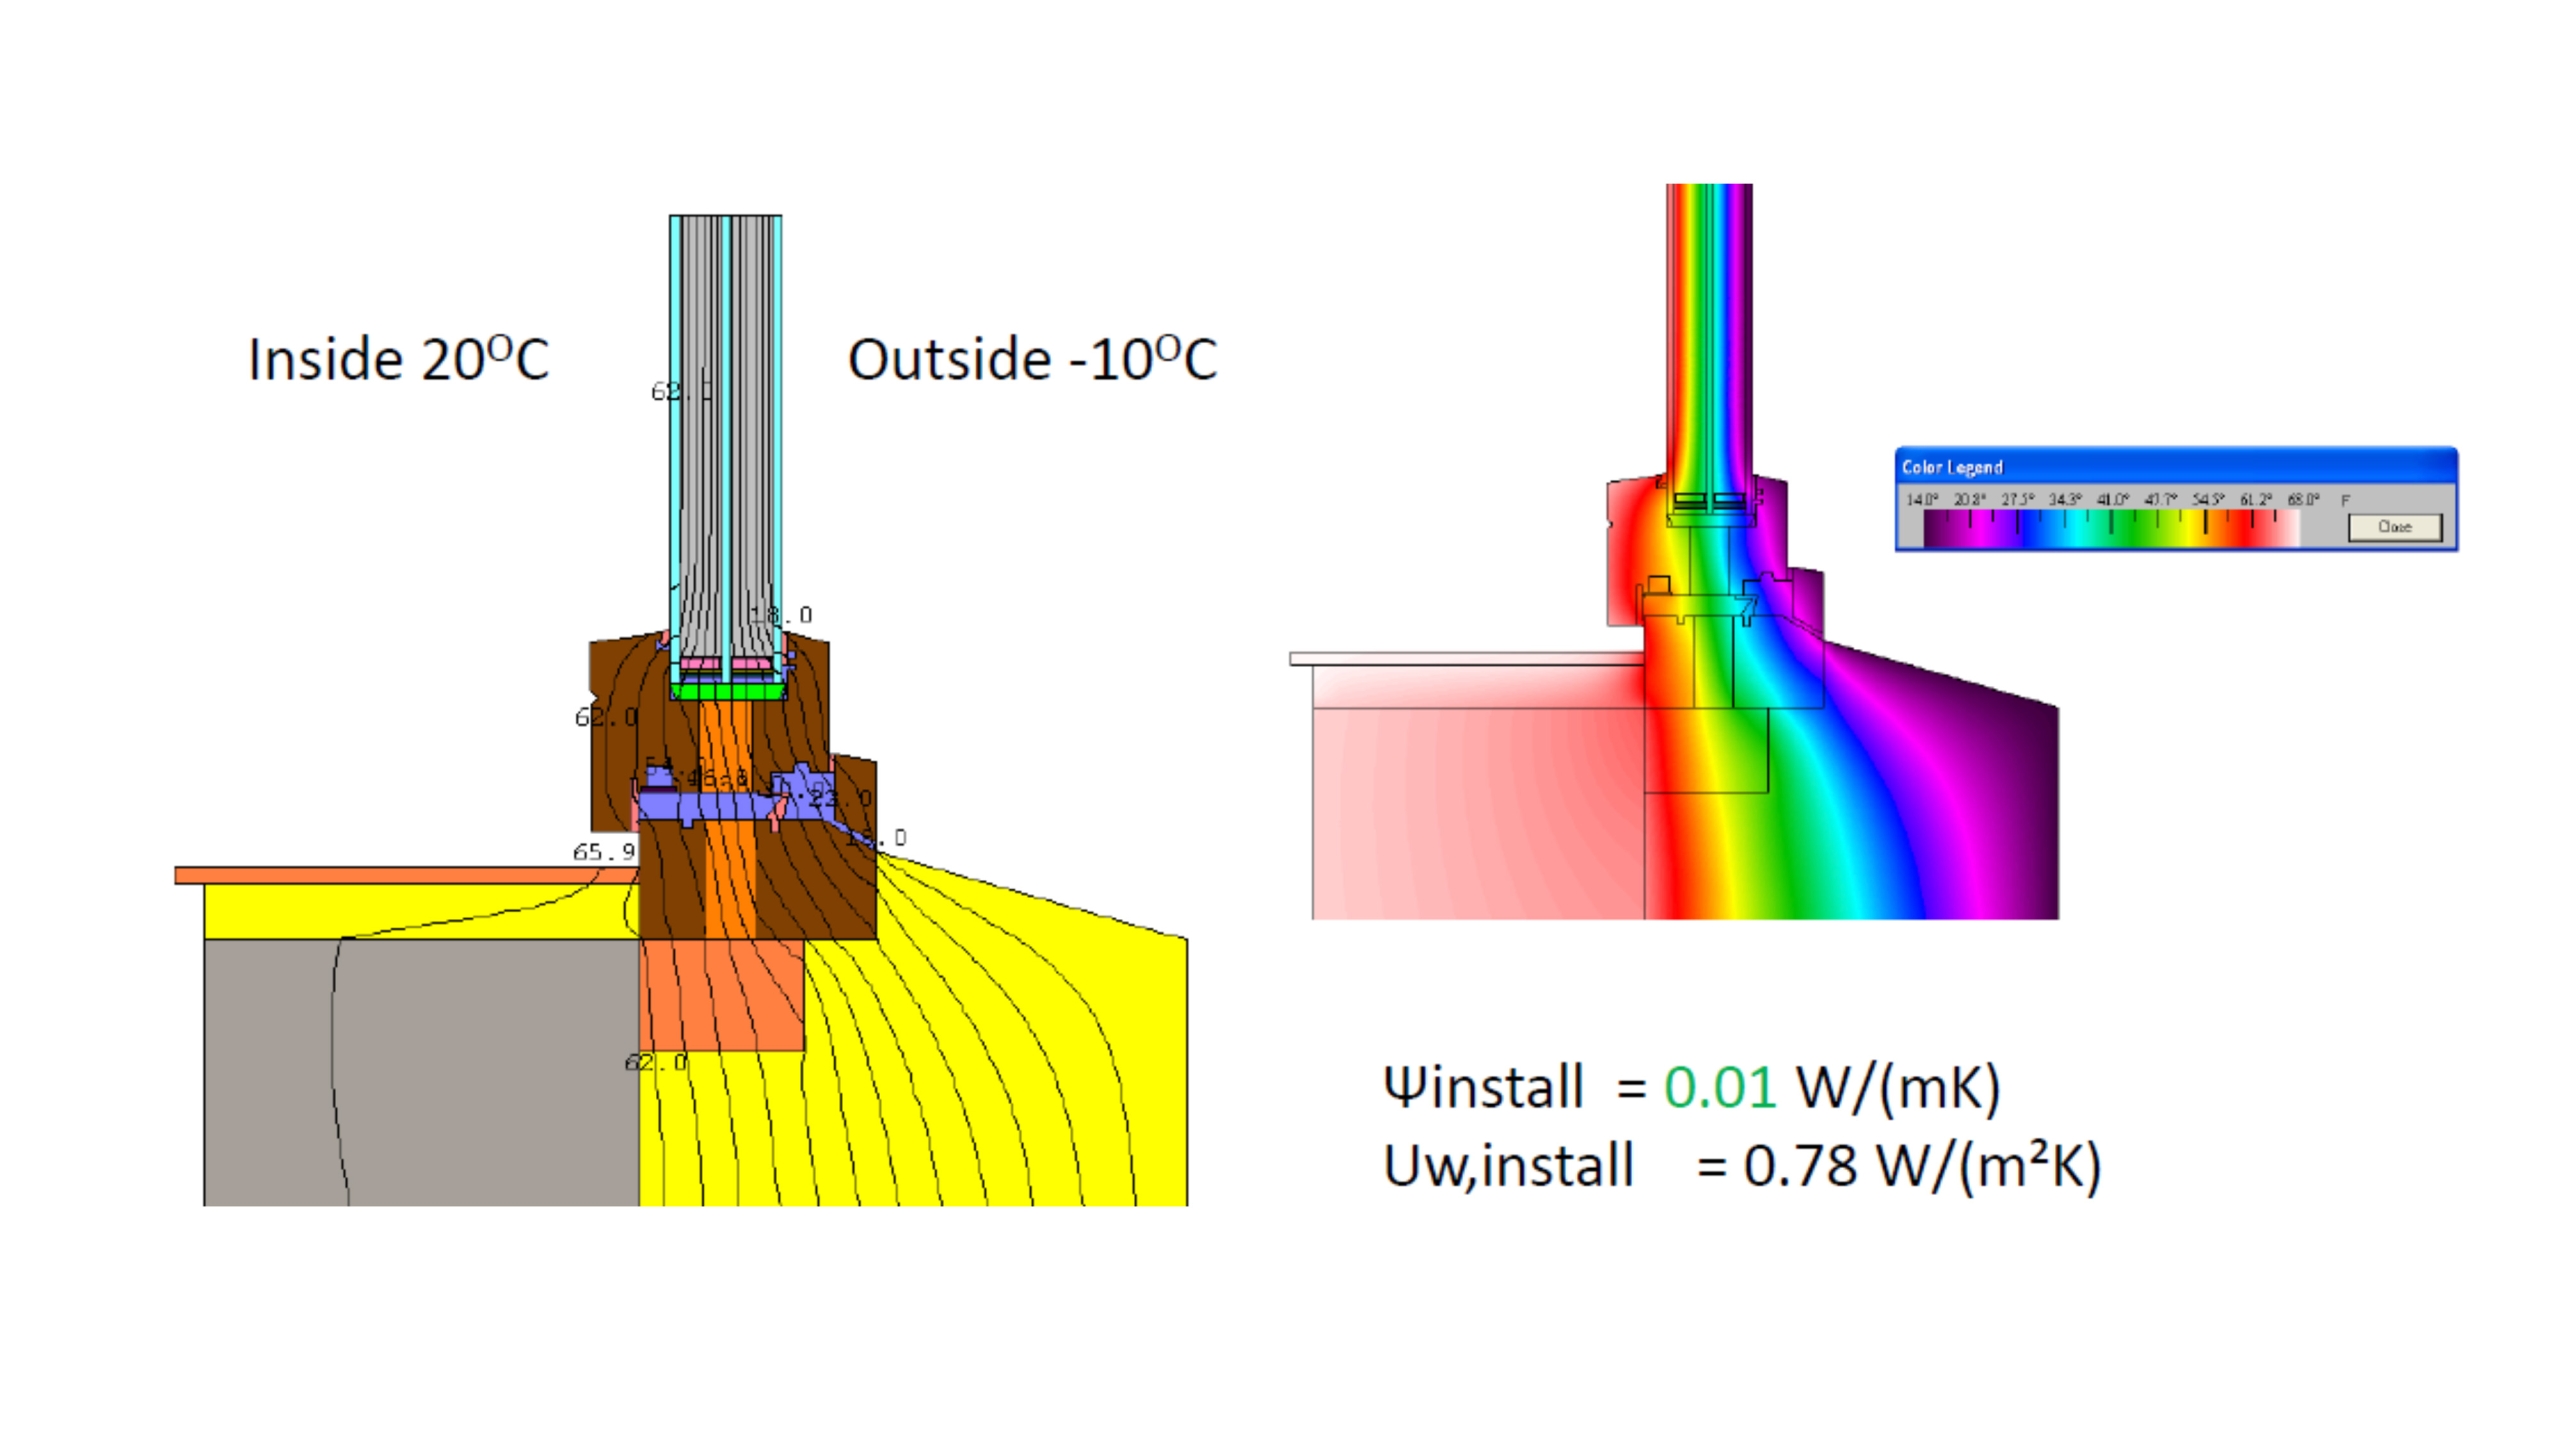
Figure 1: Thermal bridges in window to wall interface (source: PassiveHouse Canada training course)
If the window will be an innie, how can the rough opening and window be flash to limit moisture intrusion? Well we’ve talked about that in a previous article Why Windows Leak & How to Control Water Ingress Effectively – Part 2 and those practices can be applied to innie windows.
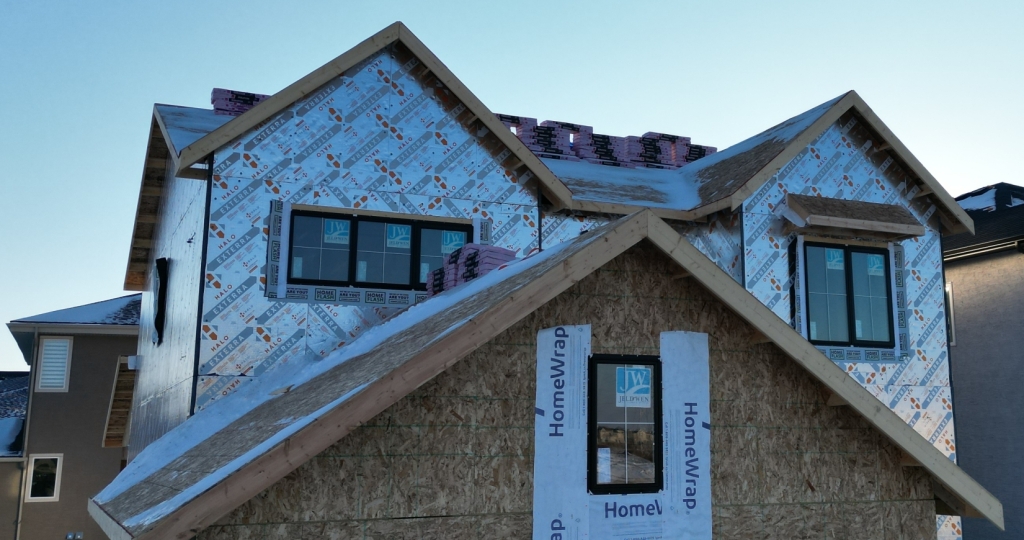
As buildings in North American feature more exterior insulation such as Halo® Exterra® and the centre point of the insulation layer moves out overtop of the exterior insulation, a logical question of how to support the window arises.
Below we will review 5 different methods to support a window that fully or a partially rests on top of the exterior insulation layer.
Sill Plate in Conventional Framing
In situations where there’s a small amount of exterior insulation, less than 2 inches (50mm), and most of the insulation is contained between the studs, the centre point of the insulation will likely occur overtop of the wooden sill plate.
Since the sill plate is handling the weight of the window, the exterior insulation can be brought flush to the rough opening (Figure 2). The cladding contractor may not love this solution as to secure cladding longer fasteners will be required that must connect to the structural component of the wall assembly.
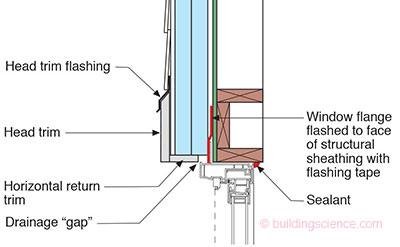
Figure 2: Exterior insulation flush with rough opening (BSI-085: Windows Can Be A Pain*—Continuous Insulation and Punched Openings | buildingscience.com)
Line Vertical Face of Rough Opening with Furring Strips or Dimensional Lumber
This detail will help you become better friends with the cladding contractor, but not the Passive House Consultant.
Installing furring strips or dimensional lumber on the front face of the exterior sheathing yields solid backing for the securement of cladding or trim pieces (Figure 3). As a greater portion of the insulation is placed outboard of the wall assembly (moving centre point of insulation) the dimensional lumber can be used to carry the weight of the window.
Be sure to attach the dimensional lumber back to structural framing members with the appropriate fastener. From a thermal perspective, interrupting the continuous insulation layer with wood does introduce a minor thermal bridge as the thermal conductivity of wood is generally low.
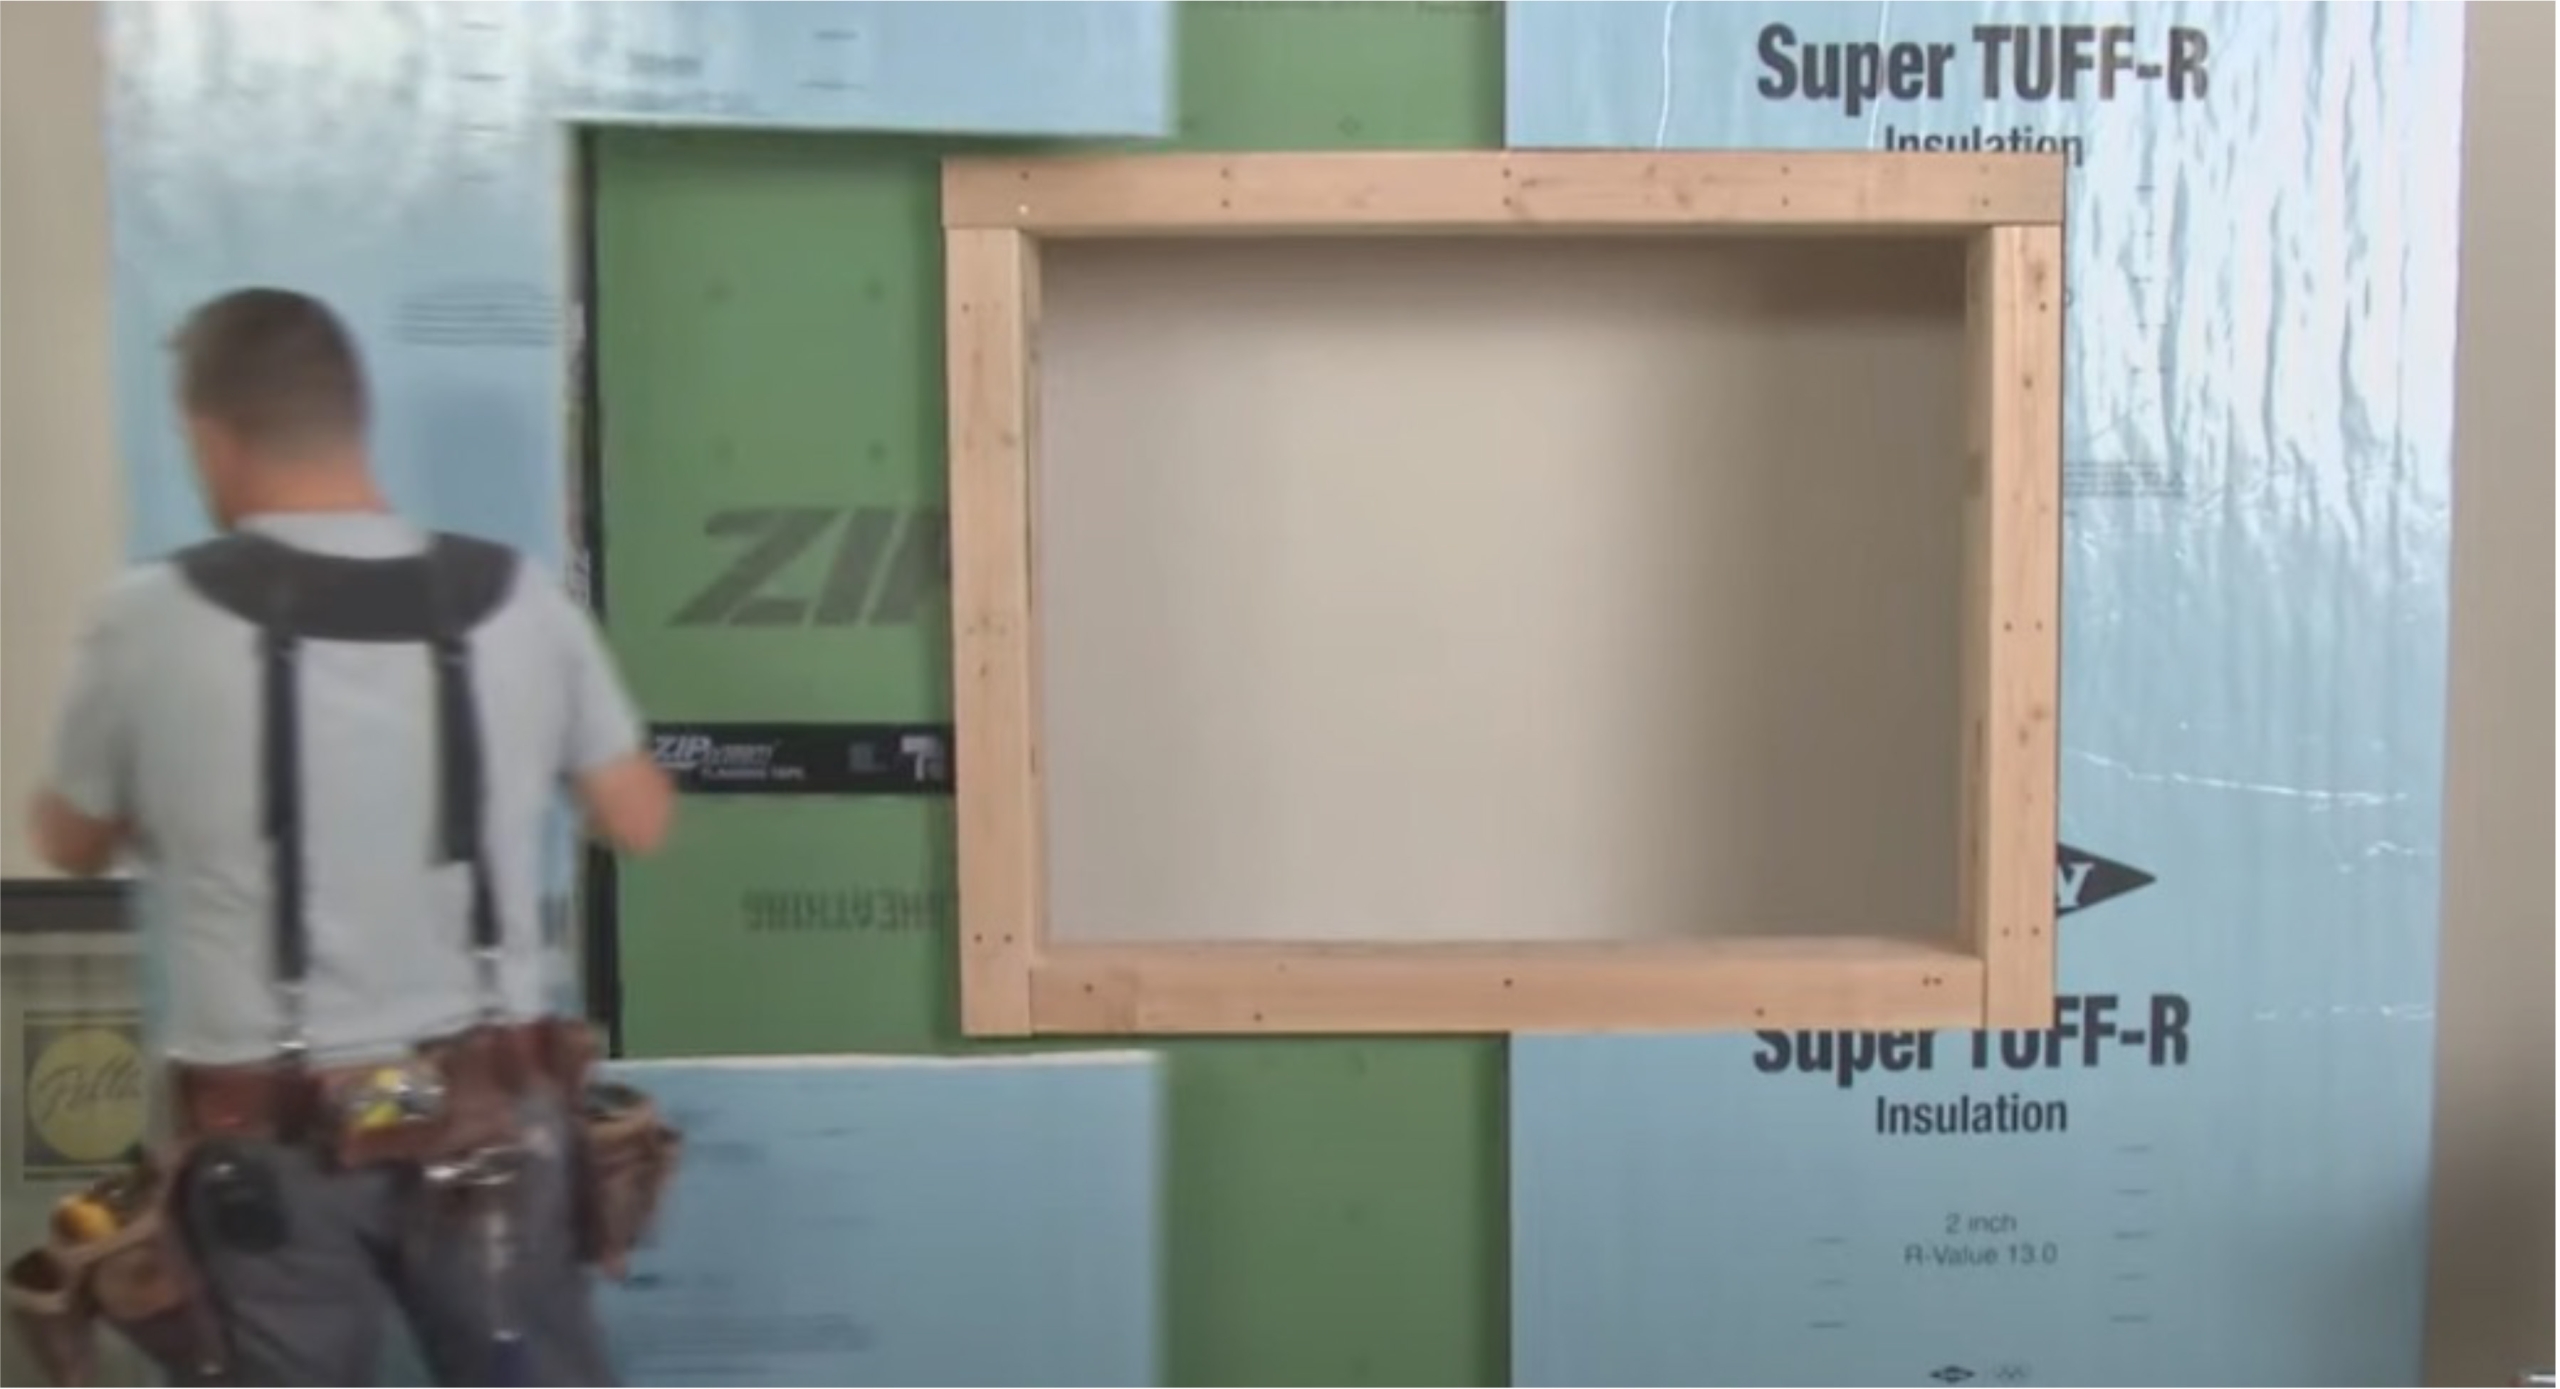
Figure 3: Preparing a rough opening with exterior insulation (source: How To Install Nail Fin Windows Over Rigid Foam Insulation | Pella)
Line Interior of Rough Opening with a Structural Box
An alternative to furring strips or dimensional lumber would be to line the entire interior of the rough opening with OSB or better yet plywood sheathing (Figure 4).
The structural box protrudes past the rough opening to the thickness of exterior insulation. This solution is perfect for applications where the exterior insulation is greater than 2 inches (50mm) in thickness and depending on the width of the window can accommodate insulation thicknesses up to 4 to 6 inches (100 – 150 mm).
As the thickness of the OSB or plywood sheathing is much less compared to dimension lumber so to is the resultant thermal bridge and unless you are building to the Passive House Standard this detail will do the tick.
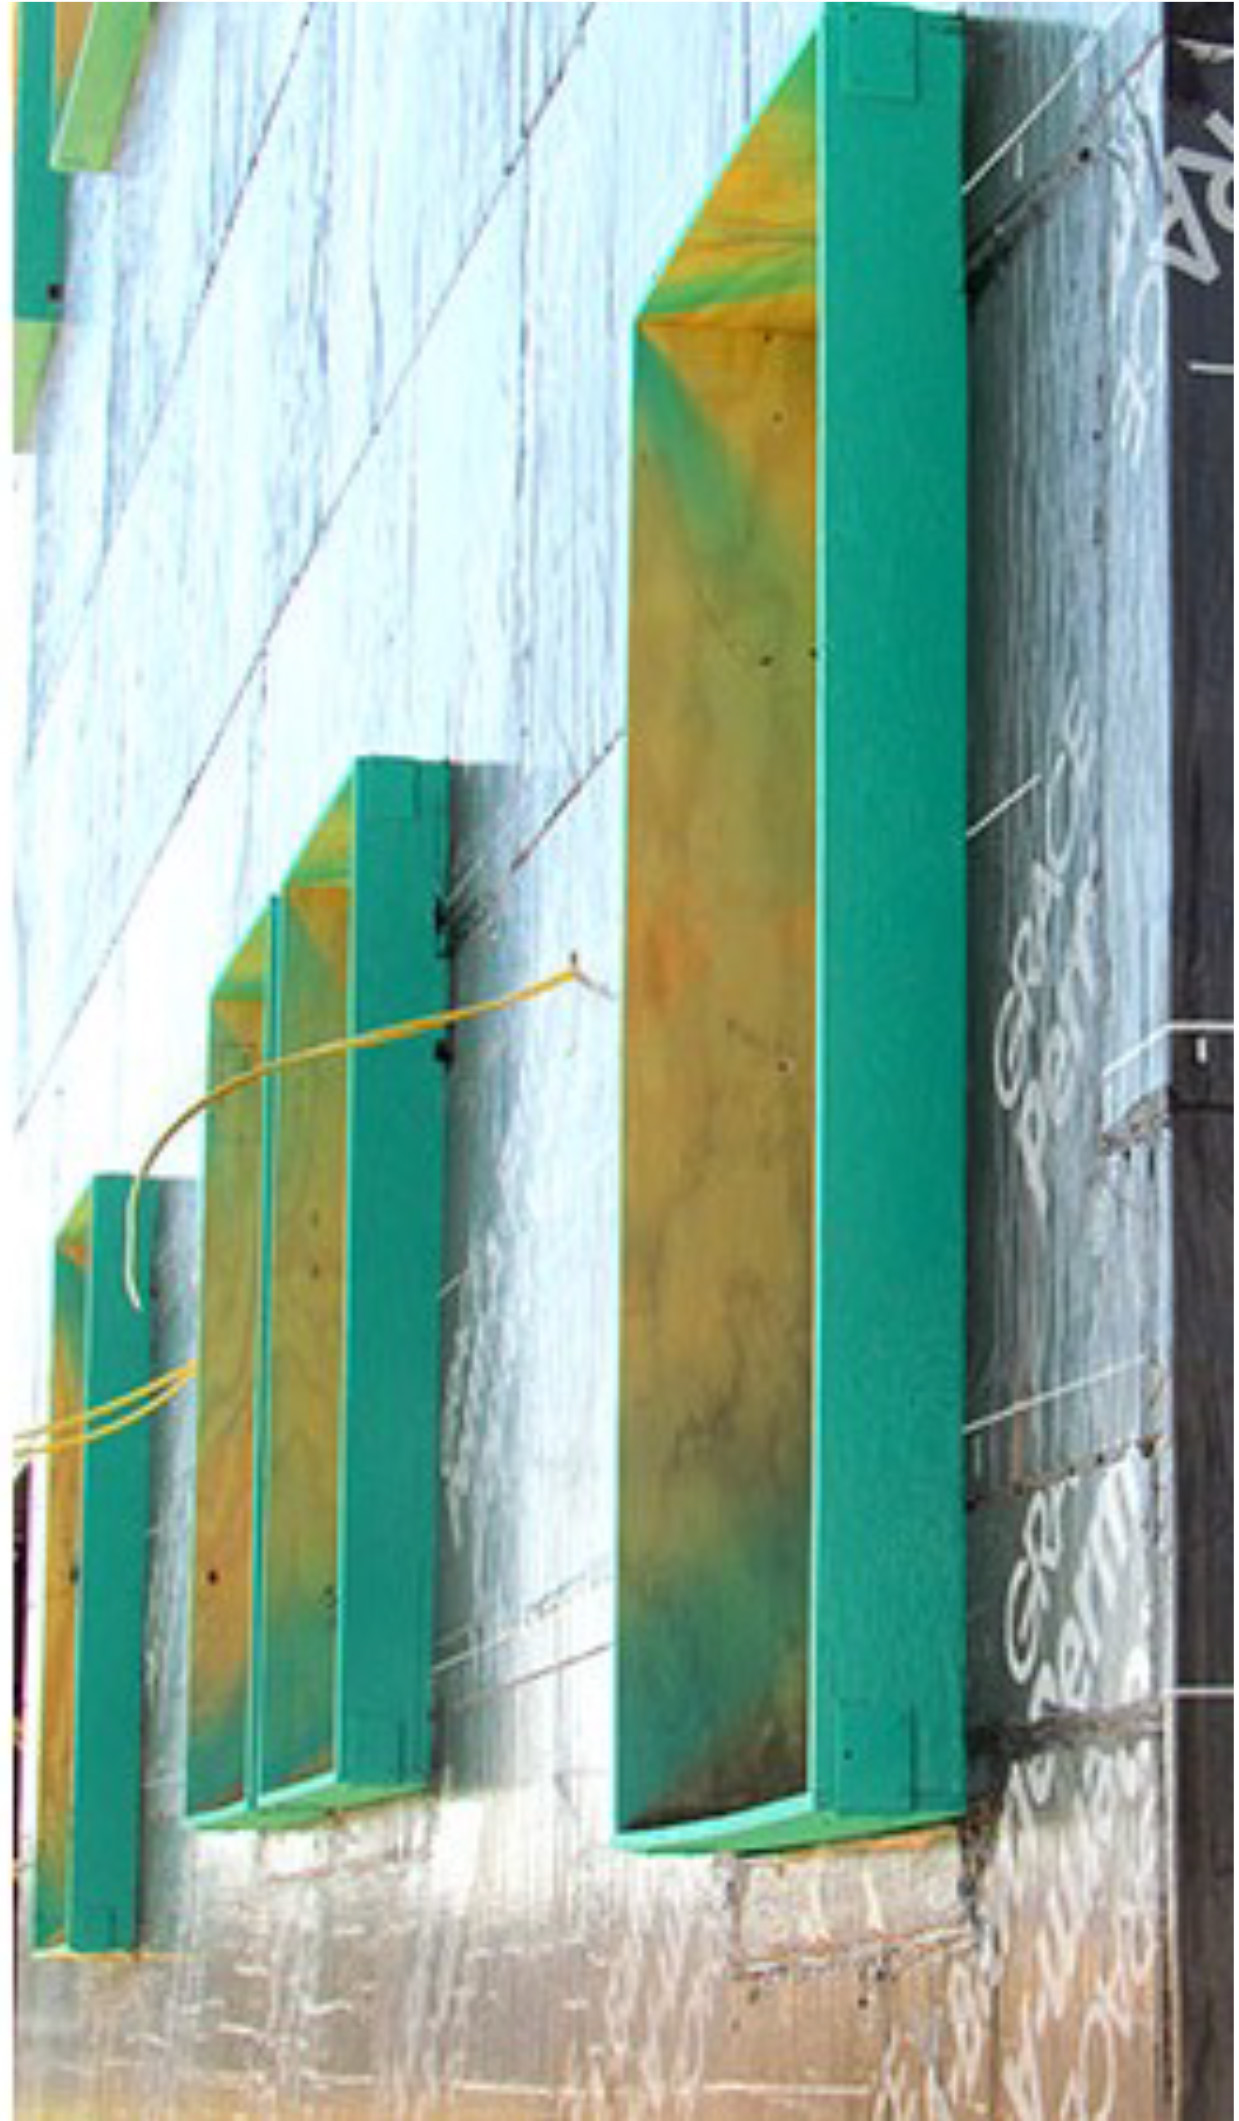
Figure 4: Exterior insulation flush with rough opening (BSI-085: Windows Can Be A Pain*—Continuous Insulation and Punched Openings | buildingscience.com)
Installing Engineered Lumber at the Windowsill
Dimensional lumber and wood sheathing have limitations on their length of span as well as the supported weight it can support.
When dealing with very large continuous window spans and/or a substantial weighted window there is the option to switch out the dimensional lumber or wood sheathing at the sill for engineered lumber such as a parallel strand lumber (PSL) or laminated veneer lumber (LVL).
Engineered lumber is a combination of glue and thin layers of wood that is stronger and straighter than traditional solid-sawn lumber making it a perfect fit to handle long spans while supporting a heavy window.
Wrap the Entire Rough Opening with a Thermally Efficient Structural Buck
If you want the most thermally efficient solution while providing structural support of a heavy or long spanned window, select a pre-engineered buck (Figure 6).
These products are typically manufactured from expanded polystyrene rigid insulation (EPS) and may or may not be coated in a weather resistive barrier (WRB).
While these products can support heavy windows that span a wide distance it’s important to adhere to the maximum loads that the product can handle to ensure long-term stability.
Figure 6: An Alternative to wood window bucks (An Alternative to Wood Window Bucks - GreenBuildingAdvisor)
Whether there’s 1 inch (50 mm) or 8 inches (200mm) of continuous Halo® Exterra® insulation on the exterior of the building enclosure, there are 5 options that allow the window to be placed that optimizes thermal performance while ensuring adequate long-term support of the window.