
Windows and the window-wall interface are significant contributors to water problems in residential buildings. But to eliminate the issue, the architectural community must move past the debate of whether a window will leak; as it almost always will. Instead, the focus should be on strategies to manage water leakage between the window and wall interface.
This is a two-part series
In this installment, Part 1, we’ll explore where windows leak and how to integrate various control layers to ensure water ingress does not occur. Then next month in Part 2 we’ll explore the Logix Brands solution to better control water ingress through a window assembly or a window-to-wall interface.
Read on to find out more!
Why Traditional Installation Methods Cause Windows to Leak
Often enough, installers fit windows into the rough, untreated openings and simply spray-foam the perimeter. And while the spray foam does provide some thermal resistance, it does not provide:
- Protection for the sill from water ingress
- Water redirection at the window head
- Complete air sealing at the air control layer
- A drainage path for escaping water
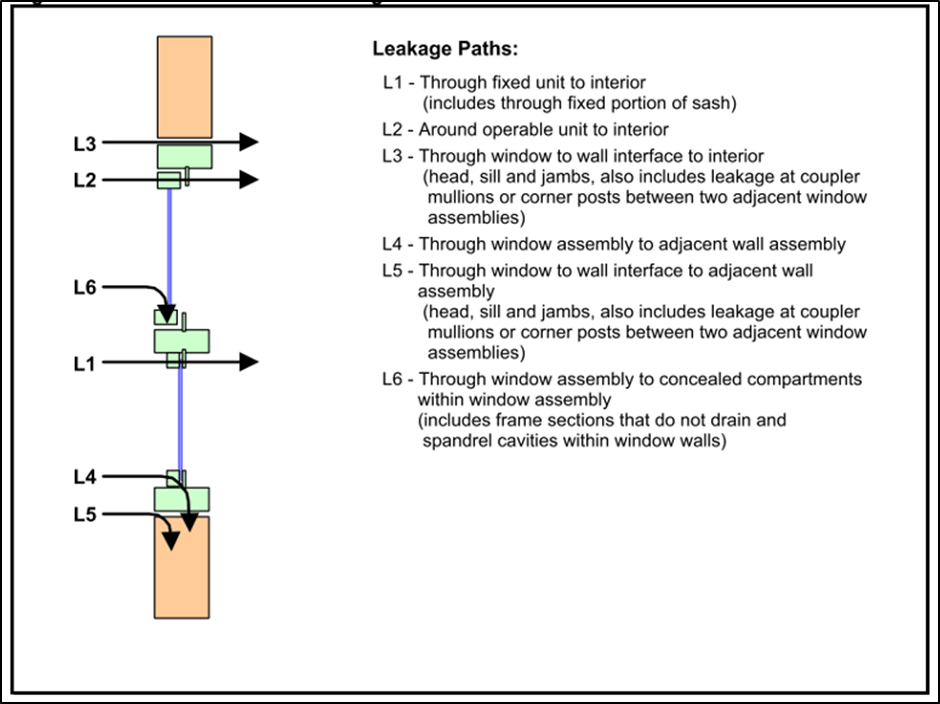
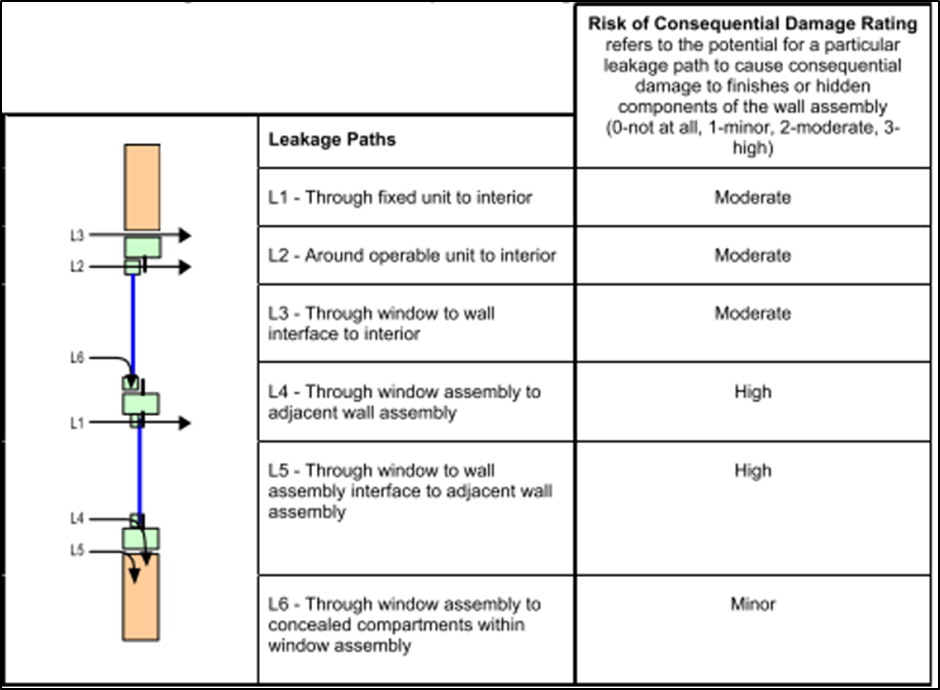
How and Where Does a Window Leak?
RDH Building Science determined six possible leakage paths during testing. Among them, paths 4 and 5 were found to cause the highest frequency of water entry and the most wall component damage.
Critical Control Layers of the Window-to-Wall Interface
Control layers critical to performance include:
- Sealants
- Gaskets and tapes
- Penetrations
- Window components
- Design & selection
- Quality control
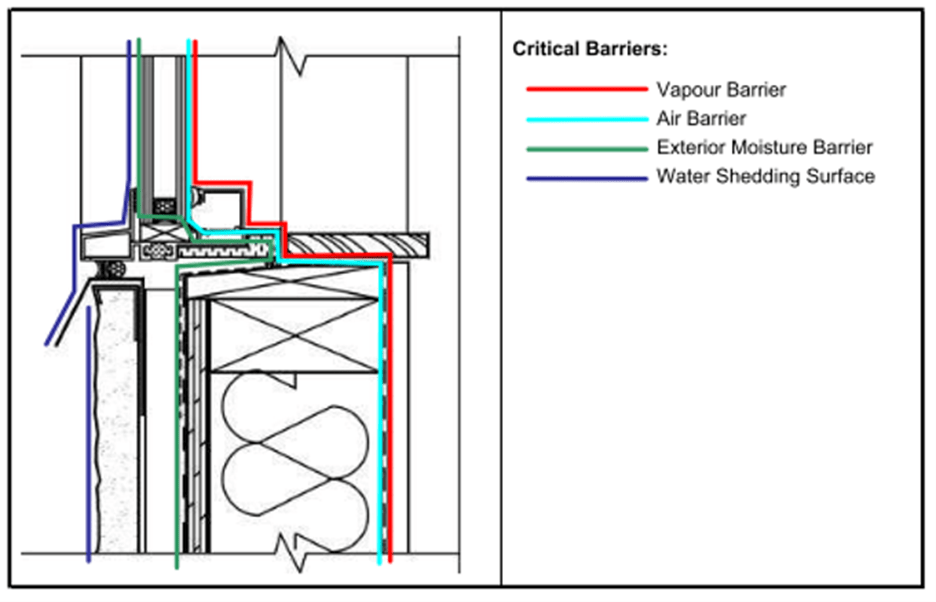
Water Shedding Barrier
The water shedding barrier is the first layer of protection, comprising:
- Glazing and tape
- Window frame exterior
- Sill drip flashing
- Cladding surface
Exterior Moisture Barrier
- Glass surface and frame seal
- Sub-sill membrane
- Exterior sheathing membrane
Air Barrier
An air barrier minimizes air (and moisture) leakage and connects with window frames for continuous protection. Caulking and backer rods are preferred over spray foam.
Vapor Retarder
This layer reduces water vapor penetration and is typically found on the warm side of the wall assembly.
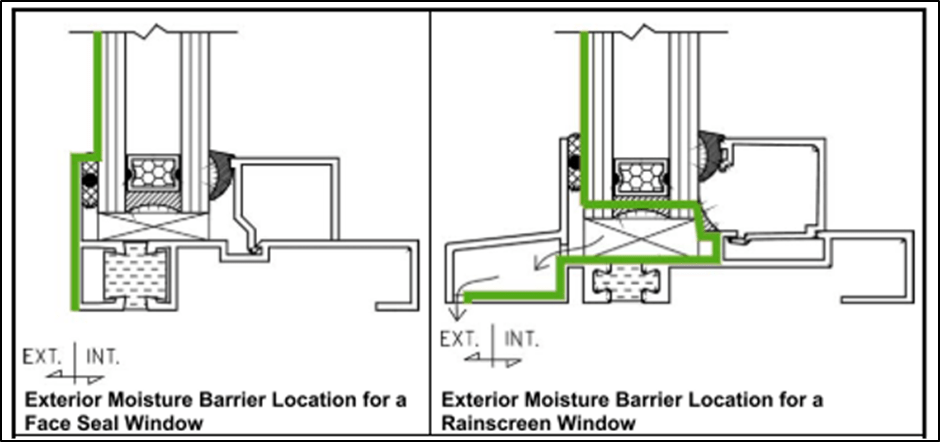
Face Seal vs Rainscreen
Face Seal: Seals window to exterior membrane face; best for low-rain areas.
Rainscreen: Adds an air gap and redirects water inward for drainage, offering superior protection.
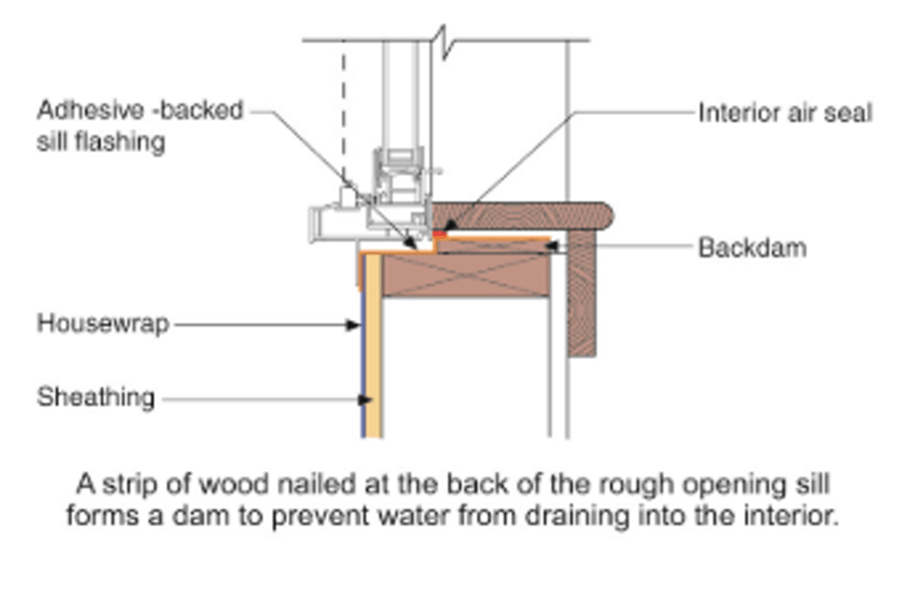
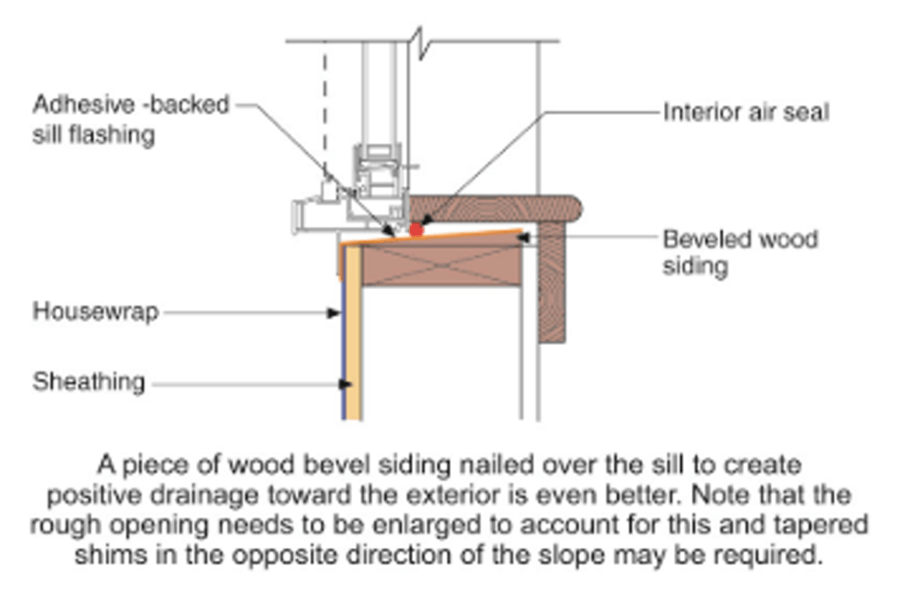
Importance of Pan (Sill) Flashing
Pan flashing prevents water damage by redirecting moisture out of the assembly. It includes a back dam, end dams, and extends beneath the window.
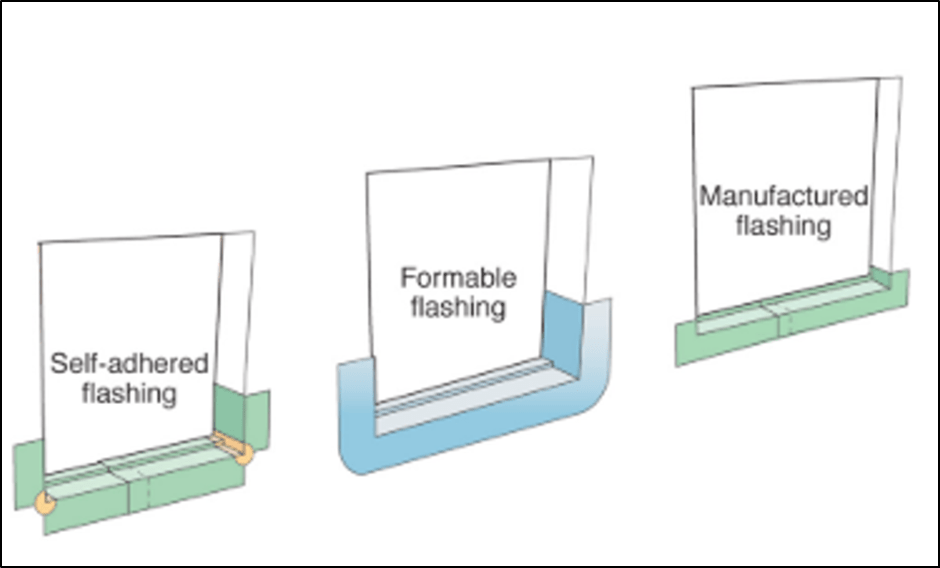
According to Dr. Joseph Lstiburek, key characteristics of effective pan flashing include:
- Continuous, watertight surface
- Positive slope or back dam
- End dams to prevent lateral flow
- Overlap with the drainage plane
Wrapping It Up
This article outlined:
- Typical window leakage paths
- Critical control layers at the window-to-wall interface
Stay tuned for Part 2, where we’ll detail durable window flashing installations with Halo® Exterra® and Logix ICF with Pro Buck.
References:
Water Penetration Resistance of Windows, 2002
Pan Flashing for Exterior Wall Openings, 2013


